Tuesday, January 24, 2012

Lapping valves

So, you have heard of "lapping valves", "fresh top end", or "top end rebuild"? Not sure what lapping valves means? Read on.

If your engine has low compression, you may need to lap the valves. The other possibility may be piston rings, but that's another post. Start by removing the engine, cam cover, cam, and head. Once you have the head free, you will need a valve spring compressor, lapping suction tool, needle nose pliers, and grinding compound. Beware-- all engines are different; this may not apply the same to yours.

Set the spring compressor up with the short end on the valve face. I actually made this spring compressor from a cheap C-clamp and 2 bits of steel pipe. I cut a slot in the longer piece, then welded it to the screw end. The short piece was welded to the flat end.


Through the slot in the pipe, the valve keepers are accessible with a few cranks of the screw. Pop the keepers out (visible in the bottom of the pipe under the valve tip). Back off the spring, and the valve is free.
Remove the spring or springs together, and mark which end goes towards the head.


Valve is now free. The keepers are visible below on the table by the pliers. You can peek in the top exhaust port and see the light and the valve stem.


The valve can be pulled out of the head, being careful of the valve guide. Clean the carbon off the valve a bit with some light sanding. Beware the sliding surface; it should not be sanded! The carbon should also be removed from the port. Be careful not to score the head, and beware the valve guide. 400 grit sandpaper works well.


Now you are ready to lap. Unless your valves are really pitted, you should only need "fine" grinding compound. Smear some around the edge of the valve and put the valve back in the head.

Now take the suction tool and stick it to the valve face. Using a "fire starting" motion, rub your hands together with the tool between them. You will hear a scratching sound as the valve rubs back and forth, but it will get softer as you go. When the hand-rubbing/valve-spinning becomes quiet, pull the valve out a bit with the suction tool, turn it 90 degrees in the head, and put it back in and repeat. Do this 3-4 more times, then check by wiping off the grinding compound.

You should have a shiny seat and valve edge that don't photograph well. In the picture below, the grinding compound is still on, but the valve and seat are shiny all the way around. If you have a large gap of non-shinyness, you may have a bent valve. Bent valves would also cause compression leaks, but are generally preceded by a catastrophic engine failure of some sort, so you should know before you get to this point.

So, now that I have a shiny new valve seat and everything cleaned up, I'm ready to reinstall the valve. But first, I will replace the valve guide oil seal, which was under the springs on the cam side of the head. This is fairly straight forward, but the old ones can be a bear to remove. Be patient and get the needle nose pliers to pinch the oil seal off from the side. The new one should just press on, but it may take some persuasion with a mallet.

With the new bits in and valve reinstalled, the process is the same for the rest of the valves. Lucky me, this engine only has 4. The old Honda 750 I ride has 16. I hope this helps solve the mystery of valve lapping.

Wednesday, January 11, 2012

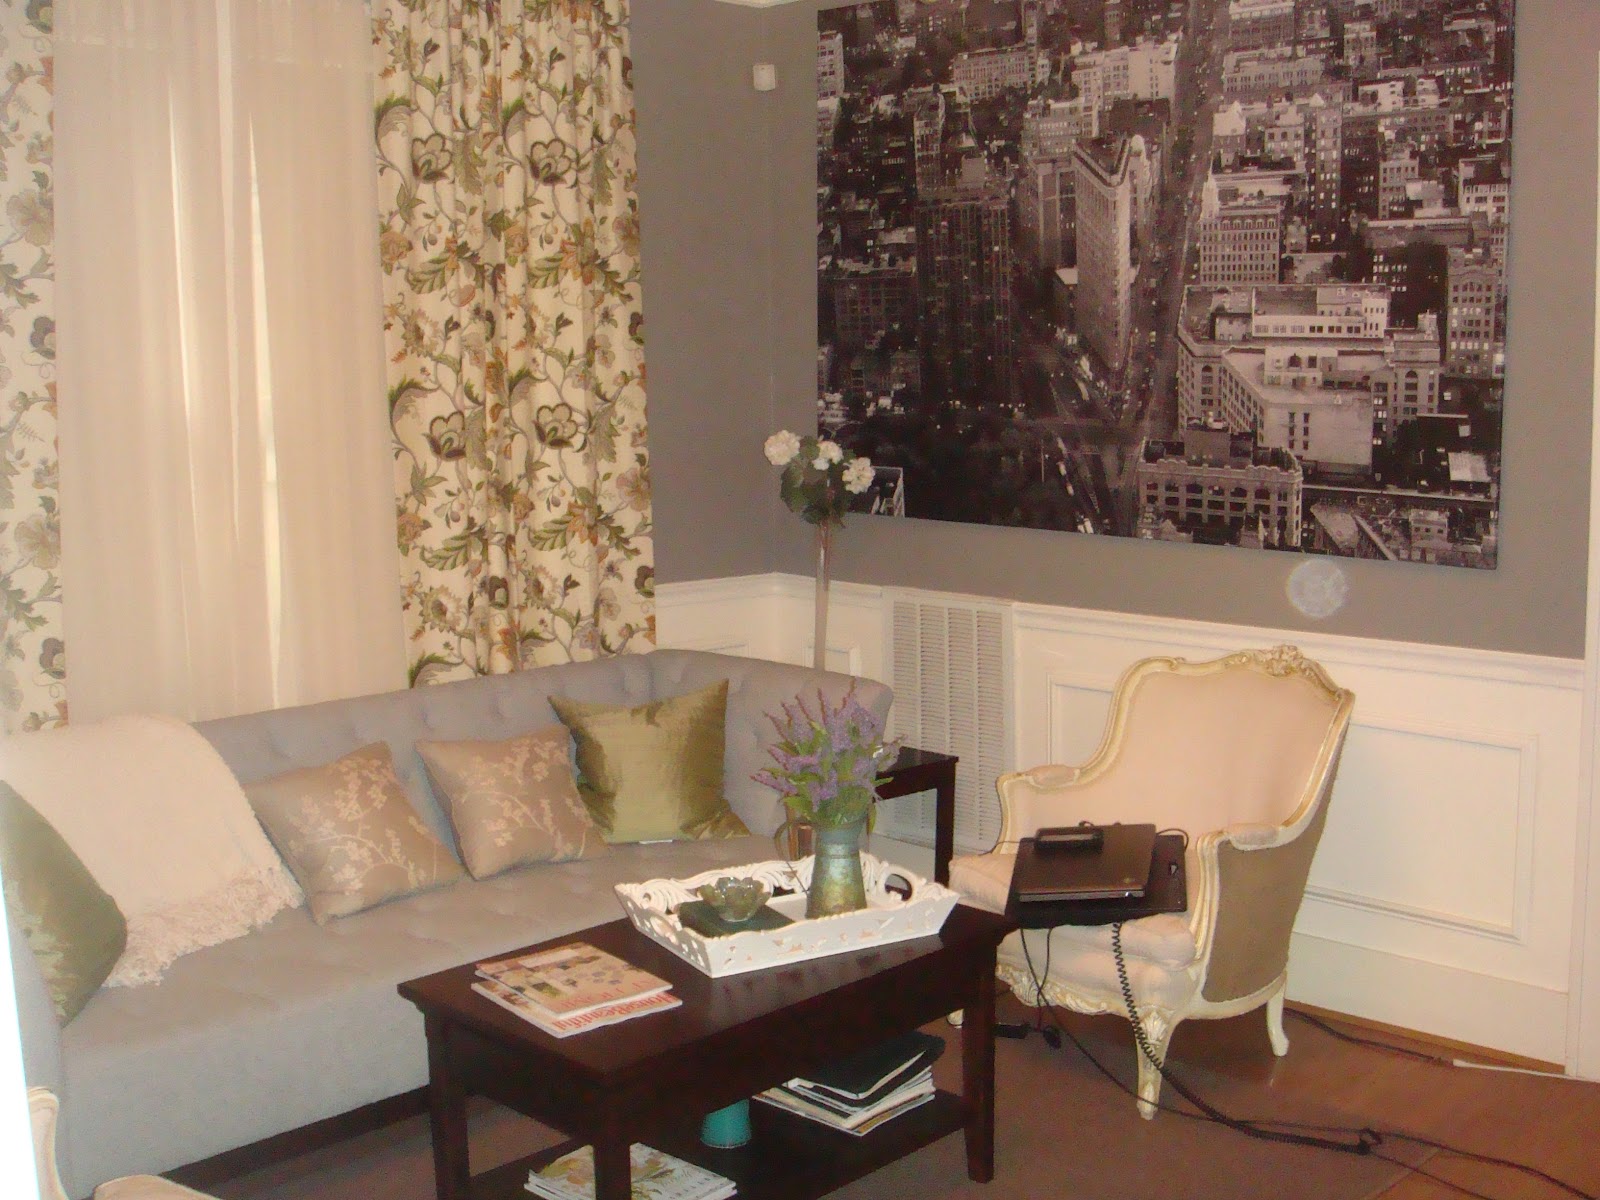
Informal Living Room Finished

Ok so John and I started working on remodeling our informal living room back in September.

This was how it looked originally.


First I started the remodel with the removal of the awful border. More information on how I did that can be found here.

Then I knew I wanted darkish gray walls, with a white chair rail with boxed molding, so I began to paint. I originally painted the room Ashes by Behr, but it was a lot lighter than I was wanting so I went back and got it darkened to Cement by Martha Stewart. John and I decided we wanted the chair rail 3 feet high (measured from the floor). So I measured 3 feet up from the floor and drew a straight line all around the room. Once the line was made we were able to evaluate if we liked the height. Luckily, we were happy with the 3 feet. Then I painted the Cement color down to that line and primed everything below that line.

Then John and I went to Lowe's and picked out the molding we wanted for our chair rail and lighted crown molding. We installed the chair rail (more on how we did that here) and John installed the lighted crown molding. A how-to-guide for the lighted crown will be posted soon. So after a while it was looking like this


ll the molding was installed we painted it a creamy white. Our house was built in 1915 and during that time period white was made with yellows and reds. Later one bright whites made with blue undertones were popularized. We tried to stay somewhat period and used a creamy white.

To complete the renovation we got some new furniture mentioned here and here. We also DIYed an old brass chandelier mentioned here

We also decided to rearrange the furniture. Previously the couch was up against the one wall and the TV was directly across from it. This gave us very little left over room for more seating. So to increase seating we moved the couch in front of the windows and put the two chairs on either side and put the TV on the smaller side wall which wasn't utilized before.

Here are the after pictures!


So once again here's the before


And here's the after


Dining room mini makeover

So when John and I got our new chairs from White Goat, a fun new French store here in Little Rock, we also found a bar for our dining room. Our dining is very wood heavy. We have half timbering on the ceiling, a wood table and chairs, and a wood wine cabinet. This is what it looked like before


John and I had discussed getting a bar so we could have a place to make drinks and store stuff. The bar we found is painted wood, so I was afraid it would look out of place in our all wood dining room. But I also wanted something that would balance out the room and make it feel more connected to our white trimmed informal living room that you can see from the dining room. So I decided to do a furniture shuffle and see if I could make it work.

We centered the bar on the wall that the painting is on in the picture above. Then I started to put on some lamps I got for Christmas from John, some candles, a tray also purchased from White Goat, and some decanters we also got for Christmas. I started liking the way it looked but the painting above it just wasn't right so we moved it to adjacent wall. I got my second sunburst mirror I made this past summer and put it there to see what it would look like and I love it! This is was the bar area looks like now.


Since I loved the new bar area so much I tried to tone down the wood in the rest of the room. To do this I put a cream table cloth with a burlap runner on the table and created gold, silver, and cream place settings.


This definitely helped the room feel connected.


Our wine cabinet was in the corner that the plant holder is now in in the picture below


So we moved it across the room


That part of the room is still wood heavy but John is going to put in some lighting in the cabinet which will hopefully lighten it up a bit. Overall I really like it and keep going out of my way to peak at the new bar area. Also we had a party recently and the bar was heavily utilized and was much better than making drinks in the kitchen!

Thursday, December 29, 2011

2012 House Projects

Now that we have our total list of projects we would like to do on our house figured out (found here), I wanted to break them down into the projects I foresee us tackling in the new year. Although the giant list is extremely helpful, it also can be overwhelming. Below is a manageable list (in some order of importance) for the new year!

Projects for 2012

-paint pantry
-add shelves to pantry
-organize pantry
-get bed for office
-re-do the office layout
-paint office
-make curtains for the powder room
-scrape sink in powder room (this has been on my list for a long time but I can't seem to get motivated)
-paint laundry room
-organize laundry room
-remove wallpaper border in guest bedroom
-paint guest bedroom
-add a fountain outside
-add some landscape lights

If we feel inspired/have time we might
-remove some wall paper (I'm already dreading this lol)
-tackle the guest bath
-tackle the kitchen

Home Repair List

As the year ends, it's a good time to reflect on past projects and plan for new ones. We accomplished a lot on our new house in 2011 -  painting the kitchen, painting the powder room, the master bedroom makeover, the informal living room upgrade, and several other small upgrades. We also sold our first house this year!

The following is a list of projects we still want to do on our house. However, we won't be able to do all of them in 2012. This list can seem pretty daunting, but it's also exciting to see all the changes we can make to make our house ours. Since our informal living room upgrade was such a big project, we will probably work on small projects for the first part of the year to "recuperate".

Kitchen
-new counter tops
-add pantry shelves
-paint pantry
-add microwave to cabinet
-figure out final layout
-get new dishwasher and stove
-build a tile back splash
-add drawers to bottom cabinets
-maybe paint or add wallpaper to china cabinet

Powder Room
-make curtains
-scrape sink

Upstairs Hallway
-remove wallpaper
-build chair rail
-paint
-add art work

Guest Bedroom
-refinish dresser
-add curtains
-move trundle to office
-get queen size bed
-paint
-get bed linens
-organize closet with built ins

Office
-rearrange furniture layout
-add trundle bed
-spray paint trundle bed
-get smaller glass desk to make office nook
-paint
-add curtains
-refinish bookcase

Guest Bathroom
-paint
-build subway tile chair rail
-re-do tile floors
-add glass shower
-add shelving

Laundry room
-paint
-add cabinets

Master Bathroom
-add walk-in shower
-build separate toilet room
-get larger vanity
-build walk in closet
-add curtains

Master Bedroom
-create walk in closet or better closet organization
-find small gas logs

Foyer
-remove wallpaper
-get large art piece
-paint
-get upholstered chair?

Informal Living Room
-get side tables
-get lamps
-move gallery wall

Dining Room
-get buffet
-get upholstered arm chairs

Outdoors
-add a fountain
-add landscape lighting
-buy new outdoor dining set
-DIY outdoor coffee table
-add white wicker chair to back porch
-re-do brick patio
-build stairs from bricks on side of house
-remove large tree

Wednesday, December 28, 2011

Salted Caramel Cupcakes

I saw these on pinterest and new I had to make them. The original recipe comes from We are not Martha. I'm kind of obsessed with salted caramel right now and these were a great way to highlight them. These cupcakes were spectacular and everyone loved them. I will definitely make them again. Below is the recipe:

Ingredients: 

Cupcakes:
1 1/2 cups all-purpose flour
• 1 teaspoon baking powder
• 1/4 teaspoon sea salt
• 1 stick (1/2 C) unsalted butter, room temperature
• 1 cup plus 2 tablespoons light brown sugar, packed
• 2 large eggs, room temperature
• 1 teaspoon vanilla
• 1/2 cup buttermilk

Directions:

Preheat oven to 325 degrees and line a muffin tin with cupcake liners.
In a medium bowl, combine the flour, baking powder, and sea salt together and set aside.
In the bowl of an electric mixer, cream the butter and brown sugar on medium-high until the batter begins to appear fluffy.


Add eggs, one at a time, until each is well incorporated into the mixture. Then add the vanilla.
Now, in three batches, add the flour and alternate adding the buttermilk, making sure that each previous batch is incorporated before adding the next.


 Fill each muffin tin about half way with batter and bake for 15- 20 minutes. Allow cupcakes to cool completely on a wire rack before the next step. It’s difficult to wait but you must.


Then cut out little holes in the cupcakes using a sharp knife.  


Then start to make the caramel filling.  The ingredients and directions for the caramel are below. It's tricky to make caramel so pay special attention to the caramelized sugar it should be golden brown. 

Caramel Filling
Ingredients:
• 1/2 cup sugar
• 3 tablespoons salted butter, cubed
• 1/4 cup heavy cream

Directions: 

In a large pot, melt sugar over medium/high heat. Begin to gently whisk the sugar until it begins to melt. Add the butter and mix until it begins to melt. Incorporate the heavy cream. The mixture will immediately begin to foam and you’ll probably feel like you’re in science class, buts its good. Continue whisking until the sauce is smooth. 
Remove from heat and allow the sauce cool just slightly.


Then once the caramel has cooled. Fill each cupcake with about 1 tbsp full.


Then put the missing piece back into the cupcake. It won't look pretty but that's ok because you will cover it with delicious frosting and it will look good.

Now the final part is the salted caramel frosting. This frosting is soo tasty, I ate a lot of the left overs ;).

Salted Caramel Frosting

Ingredients:
• 1/4 cup sugar
• 2 tablespoons water
• 1/4 cup heavy cream
• 1 teaspoon vanilla extract
• 1 stick (1/2 C) salted butter
• 1 stick (1/2 C) unsalted butter
• 1/2 teaspoon sea salt
• 1 1/2 cups powdered sugar

Directions:
In a saucepan, combine sugar and water and bring to a boil. Cook, without stirring at all, until it starts turning a deep brown/amber. Make sure it doesn't burn, but also make sure its really brown. Remove from heat and very slowly add the cream and vanilla. Lightly mix until the mixture is smooth in texture. It will foam again which is a good sign. Allow the caramel to cool, for about 20-25 minutes, but make sure while it’s cooling you keep an eye on it to make sure you’re still able to pour it. If it gets too thick, you can add a touch of water, reheat on the stovetop, and continue whisking until the caramel is pourable again.

While the caramel is cooling you can start mixing the other ingredients in the stand mixer. In the mixer, beat the butters and salt until fluffy. Slow the mixer speed down a bit and add the powdered sugar, until combined.Using a spatula, scrape the sides of the mixer (just to make sure you get all of the good stuff!) and add in the caramel. Mix until all of the caramel is incorporated.


Now just frost the cupcakes and you are good to go!


Enjoy!


Thursday, December 22, 2011

Outdoor Christmas Decorations

Since our living room remodel but us behind in our Christmas decorating, we didn't get a chance to hang Christmas lights. However, in early November, my sisters and mom came into town and we made these amazing wreaths and garland from mesh ribbon. They were fun and easy to make.

This is how they turned out


Next year I think I will add some white lights to it and some red, gold and white ornaments.